
There is a book in Japan called 52 Ways to Prune a Japanese Black Pine. Well, we better change the title to 53 Ways, as the techniques I will address here are not mentioned anywhere in that Japanese book. The reason: most of Japan does not have Florida’s virtually non-stop growing season. Hence, the techniques—especially the timing—do not exactly match those used in Japan to develop Japanese Black Pine trees. This month’s article will explain the approach I have developed after decades of growing Japanese Black Pine bonsai in Brevard county. It will be a bit longer article than usual to get the minimum correct information to you.
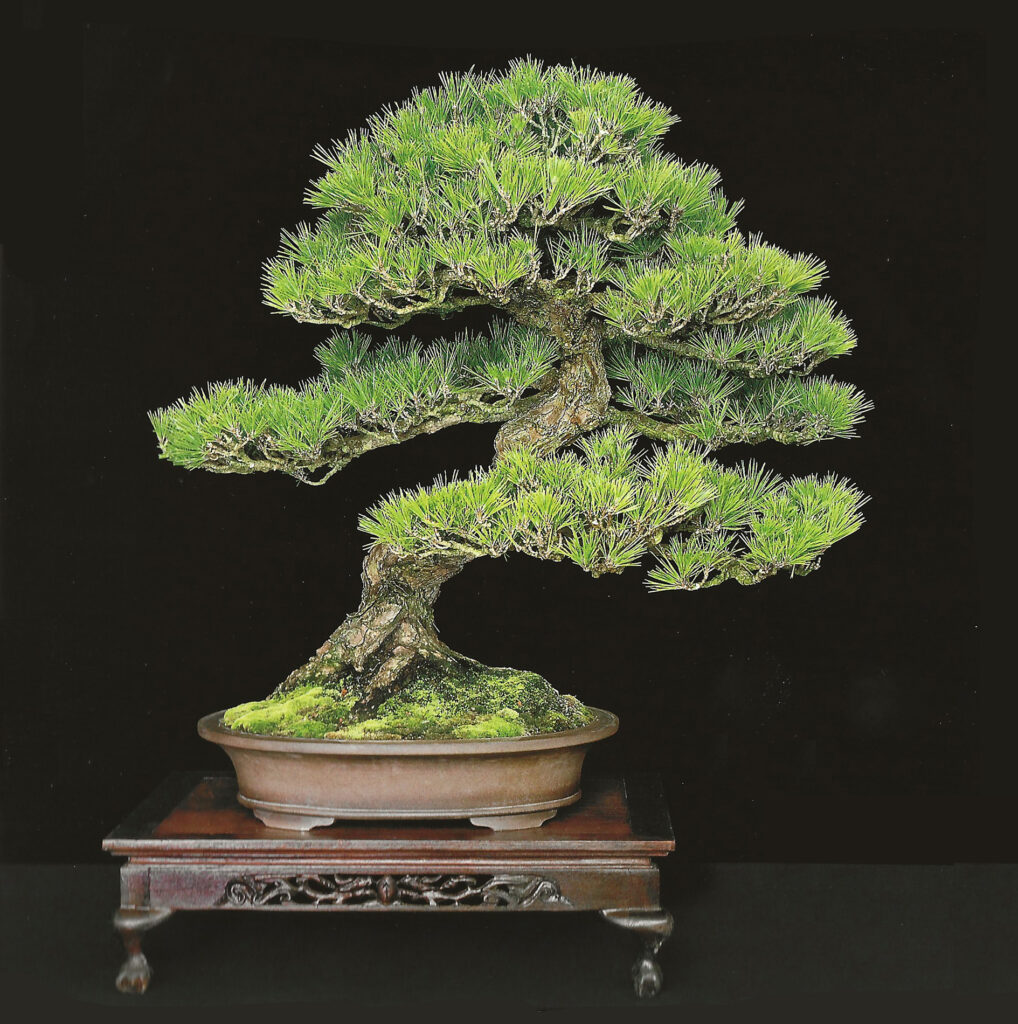
The Japanese Black Pine (Pinus thunbergii), called the king of bonsai, deserves to be in everyone’s collection. A refined specimen with mature bark and detailed ramification reflects a regal feeling. It is truly the best pine to grow in Florida for bonsai. Getting a large specimen will normally take many years of development or a large bankroll. However, one can take a nursery-grown landscape tree and, using Florida’s long growing season, significantly reduce the time needed to develop a good bonsai. This article provides background for anyone interested in growing Japanese Black Pine bonsai in Brevard County (or anywhere for that matter).
In Central Florida, we are at the southern range of Japanese Black Pine’s heat tolerance, yet with proper care they will thrive. Because of our long growing season, we can get much more out of the pine’s growth cycle than someone up north. Our pines grow nearly 10 to 11 months a year here, barely slowing down for winter. That is almost twice the duration of a northern growing season. You can think of Florida growing years like dog years—we get two for one. We can take advantage of this long season and push the tree. One caution though: Melbourne, where I live, is below the 46-degree thermocline. Melbourne has virtually subtropical conditions, with only a few days near freezing and fewer than 30 days below 50°F a year. Florida is a big state, so the timing techniques I mention will work differently in the northern tier or other locales.
Growing Conditions, Needle Thinning, and Pruning.
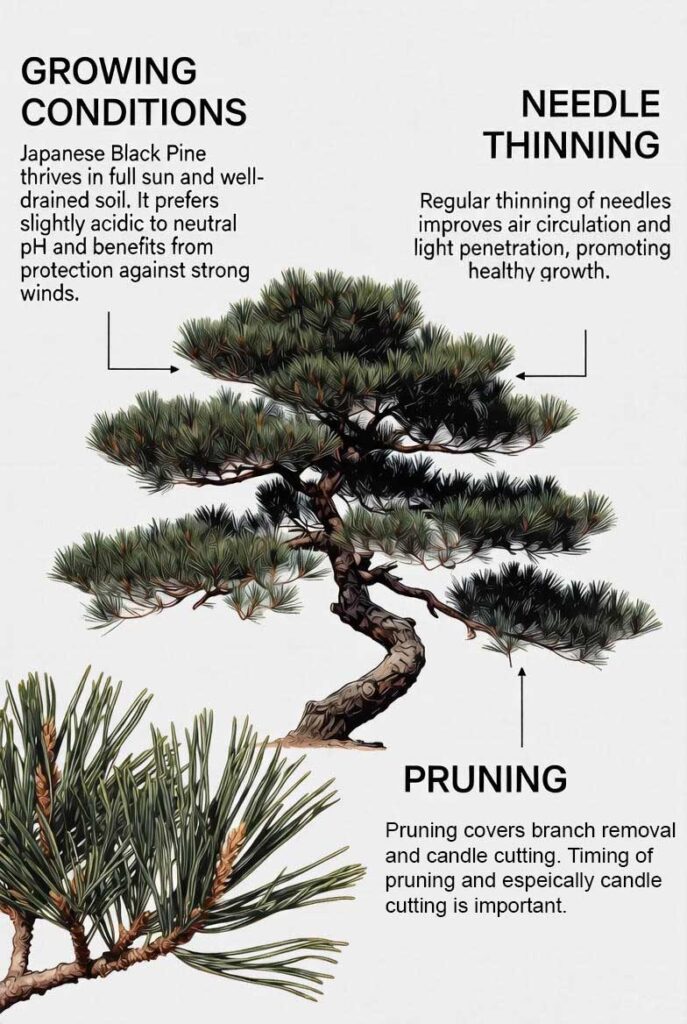
Three aspects dominate Japanese Black Pine development: growing conditions, needle thinning, and pruning.
Growing Conditions
Between Christmas and the end of January, my Japanese Black Pines enter what passes for a dormant period. While the trees have slowed down, it is repotting time, and it is safe to do root work. For soil I highly recommend a mixture of pure sifted akadama (a clumpy clay soil from Japan), sifted lava, and sifted pumice in a 1:1:1 ratio. The trees grow unbelievably fine root pads in this medium—the root hairs grow right into the soil particles. It is a bit expensive, but one bag can treat several bonsai. And after all, this is the king of bonsai, so you should spoil it. If you don’t use akadama, then use a very fast-draining soil, such as a mix of large-particle lava rock and pumice. Japanese Black Pine likes plenty of water, but not wet feet. Therefore, when we have lots of rain, fast-draining soils help prevent root rot. When repotting, take it easy, especially on old trees. Remove no more than a third of the roots. Pay particular attention to how you handle the trunk, as old flaky bark adds character. Rough handling will rub off the bark and spoil the look.
Watering a Japanese Black Pine requires more caution than watering a typical tropical plant. The trees need water only when the top level of soil has dried. A simple way to check this is to leave a wood dowel (a broken chopstick works well) stuck in the soil. Prior to watering, remove the dowel and look at the soil-end. When it is almost dry, it is time to water the tree. The frequency of watering depends on root mass, wind, temperature, rain, soil composition, amount of sunlight, and the tree’s health. Do not blindly water them whenever you water your ficus or buttonwoods—this will kill a Japanese Black Pine. In winter their water intake decreases significantly, likely due to lower temperatures and reduced metabolism. It is not unusual to water only every 3 or 4 days in the cooler months.
When using an inorganic soil mix like I do, feeding becomes very important. Some pine enthusiasts advocate using organic fertilizer exclusively on Japanese Black Pine. I tried this for a few years with good results. However, I have lately migrated to inorganic fertilizer, as I use on my other trees, for two reasons: inorganic fertilizers such as granular Miracle-Gro are more convenient and less smelly, and organic cakes can clog soil during our monsoon conditions, leading to root problems.
Where is the Tree in its Design Cycle?
The key to growing a Japanese Black Pine bonsai is to encourage growth on some branches and back budding on others. With tropical trees, hard pruning and defoliation accomplish this. With pines, needle thinning and pruning at the right time achieve the same effect. Before you begin, consider where the tree is in its design cycle. (If you are not familiar with the concept of design cycle refer to Chapter 5 of my book “Introduction to Bonsai: Growing and Appreciating Bonsai Across the Globe” https://www.amazon.com/Introduction-Bonsai-Growing-Appreciating-Across/dp/1098773462 Seedlings or newly pruned nursery stock require different development approaches than a finished bonsai. For instance, needle reduction on sacrifice branches should not be practiced while you are still trying to grow branches. Also, as with all trees, only work on healthy specimens. Applying these techniques in our southern zone can be fatal to a weak Japanese Black Pine.
TIMING IS EVERYTHING
Needle Thinning
In my garden, by Christmas the Japanese Black Pines have finished pushing their last batch of needles. These need to be removed to make room for more needles, to get sun onto the branches for interior growth and back budding, and to increase air circulation to prevent fungal attacks. I prefer the Christmas break for needle thinning. I use the red maples in my yard as a guide—when their leaves fall, it is time to remove last year’s pine needles. With a healthy tree, I will needle-thin again in late July or August. The tree still has almost four months to grow—equal to an entire growing season in more temperate areas. I also remove damaged needles (broken during wiring, chewed by insects, or affected by fungus) throughout the year.
By the way, most people think of pine trees as evergreen, but they still undergo abscission (process of losing leaves) . They lose needles each year; they just don’t lose them all at once like broad-leafed trees. Needle thinning simply helps nature drop the old needles so they don’t detract from the tree’s inner development.
Removing needles to encourage interior growth represents one aspect of energy balancing. Many authors describe this with mysterious-sounding rituals, but it is really simple: if a needle is shaded, it cannot photosynthesize and its branch will eventually give up and stop budding. Therefore Interior buds will also fail to develop. Japanese Black Pine, like many trees, strives for maximum sunlight, so it diverts nutrients to the branches receiving the most sun. Hence the top grows more vigorously than the bottom (called apical dominance) , and the exterior more than the interior. The goal in bonsai is to control this growth and balance vigor between exterior and interior, and between upper and lower branches. Hence you remove more needles from the top than the bottom of the tree.
Needles make food for the tree. The more needles a branch has, the faster and stronger it grows. By reducing needles on strong branches, you slow their growth and give weaker branches a chance to catch up. If you want a branch to develop you remove less needles from it or none at all.
In needle thinning, think of the rule of opposites: strong branches end up with fewer needles; weak branches retain more. Leave at least two to four pairs of needles on vigorous branches. On weak branches you can leave as many as 5–7 pairs. The older needles are usually on woody stems, though if you have been diligent in earlier thinning cycles, the old needles will be closer to the branch nexus. New buds often appear at sites where needles were plucked. Exactly how many needles to leave depends on careful observation and your goals for each branch. Hard rules rarely apply—especially in Florida.
Pruning Branches
When pruning branches, you will mostly cut shoots (candles). Occasionally, when restyling, you may need to cut a woody branch—always do this with great care, as it takes significant effort to regrow a branch on a Japanese Black Pine. For energy balancing, keep in mind the developmental stage of the tree. Newly styled nursery stock may need vigorous shoots to grow a tapering trunk or cover a chop scar—don’t interfere with those. For sacrifice branches, let them grow, with only slight needle thinning and pruning.
Depending on the tree’s stage, vigorous shoots—especially at the apex and outer silhouette—may need pruning, as needle thinning alone may not be enough. After pruning, it may be necessary to remove some fresh needles from very vigorous shoots.
When pruning, general bonsai rules apply. Always prune to create bifurcation—only two branches from any node. Japanese Black Pine branches swell quickly if three or four branches emerge from a single point. Avoid bar branches; they distract the viewer and cause localized swelling. On nursery stock it may be hard to eliminate all bar branching, since young pines often grow opposite branches at nodes. If you absolutely cannot eliminate a bar branch, use wire to reposition the foliage so the bar joint is hidden or visually softened.
Never prune a branch so that no green remains. As with most pines, branches with no needles almost never bud again (I have seen it happen, but it is rare and not reliable). Always cover woody cuts with sealer; dark-brown cut paste works well.
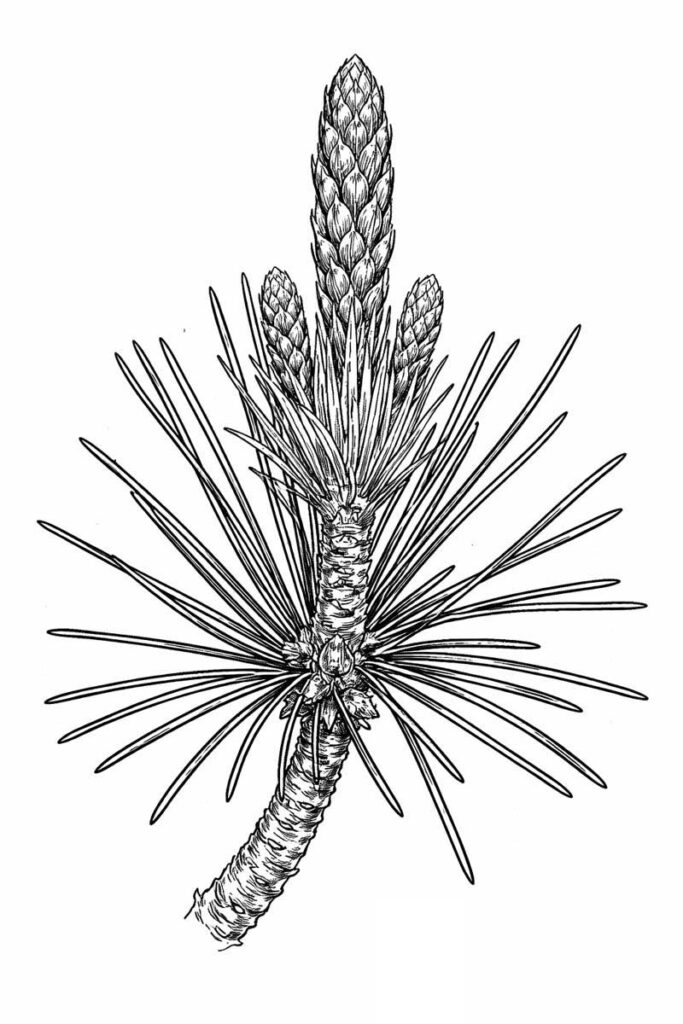
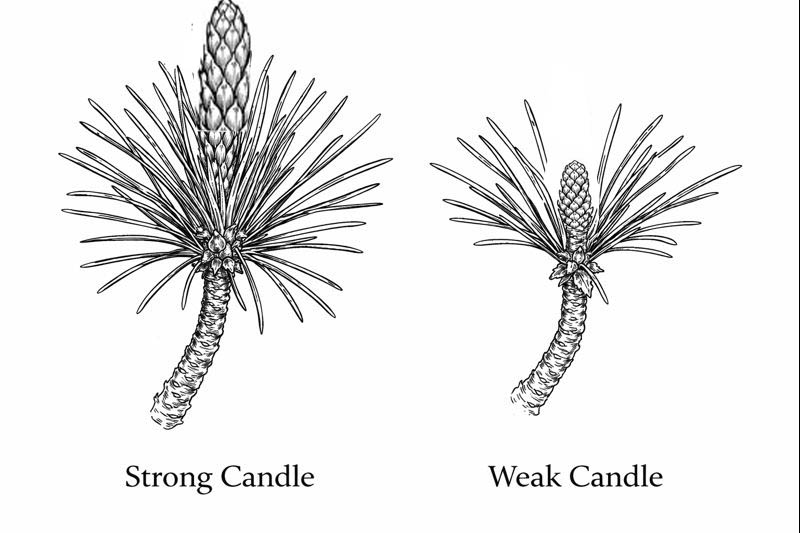
Candle pruning varies widely in technique. For simplicity: trim candles just after needles appeared. Trim them as far back as is consistent with your development goals. For example, on a branch needing length, leave the trimmed candle several inches long. For a finished tree, trim candles to about ¼ inch. On a healthy tree, I prune twice a year—during repotting in January and again in August. A few weeks after pruning, new buds will emerge at the cut sites. Remove all but two buds to encourage bifurcation. If a branch is weak, you can leave one or two extra buds for a few months, but never more than a year. Always wire after needle thinning and pruning. You will inevitably break some needles while wiring, so don’t fully finish thinning until after wiring; otherwise you may end up with no needles (not good).
There is an additional pruning technique for needle length reduction. Only attempt needle length reduction on established, healthy trees, and remember that needle length reduction is temporary. The wonderful trees you see in magazines or major shows were trained so their needles would be short at showtime. In Japan, major artists show their pines only about every 5 years, as needle reduction stresses the tree. Needle reduction also slows development. Some years you might not do needle reduction to allow a tree to get stronger.
TWO TYPES OF CANDLE PRUNING
The key to needle reduction is to time the pruning so the tree has less season remaining to grow full-length needles. This is tricky in Florida because our trees hardly stop growing. As mentioned above we can use two flush candle cutting for optimum branch development. This means we can cut candles twice per year. Once in January and once in August. This gives best branch development and good for phase 1-3 trees. For extreme needle length reduction for phase 4 trees, let the candles fully extend, then cut them hard later in the year. This means skip the January pruning, let the candles extend, then prune hard in late August early September. It seems counterintuitive, but cut the weak candles first, then two weeks later cut the strong ones. This gives the weak candles more time to grow their new, shorter needles. Alternatively, you can cut all candles at once—cut the vigorous ones harder and the weak ones less. By next January, resume the normal regimen or the tree may lose shape. Perform extreme needle length reduction only every other year, and less often for old or stressed trees. Remember with Japanese Black Pine trees in Florida take it easy on them. The hot weather and lack of dormant period places a lot of stress on these trees.

Many additional techniques exist—such as reducing water and fertilizer, adjusting timing to prepare a tree for a show, or allowing the tree to become pot-bound—but these must be tailored to your soil, watering habits, climate, and other variables.
Grafting
When developing Japanese Black Pines from nursery stock, especially large-trunked trees, it is often necessary to replace a thick branch with a thinner one or grow a new branch in a needed location. Since they hardly ever bud from old wood, grafting is the only option. Grafting may seem like a skill reserved for advanced practitioners, yet it can be learned with practice.
Japanese Black Pine might seem fussy compared to tropical bonsai, but there is real satisfaction in watching one mature into a fine specimen. These techniques are not far removed from other bonsai methods. And since they are grown throughout the U.S., demand for them remains high.
Summary: The Seasonal Flow in Brevard – you adjust whether you live north or south of Brevard.
| Season for Brevard Florida | Focus for this Period | Key Tasks for Two Flush Growth Development |
| Early Spring (January) | Growth begins | Candle observation, cutting branches and candles (for two flush per year process) on healthy trees. Fertilization, assessments repotting. |
| Late Spring | Candle strength | Light wiring, bud selection |
| Early Summer | Refinement | Needle thinning if needed (not much to in this period) |
| Mid–Late Summer (August) | Second flush | Candle cutting, Light wiring, water control due to excessive seasonal rain |
| Autumn | Hardening & energy | Fertilization, wiring, needle thinning, autumn bud pruning |
| Winter | Structure | Pruning, wire adjustments, repot planning. water control (scale back, water only when soil is dry) |